
How I Saved Money and Abstracted Away My Backend With TakeShape.io
This is my experience building OnePush: an app to synchronize my blog posts to multiple platforms.
The Problem
You have a killer app idea, but you don't want to burn a ton of money, time and effort setting up the backend.
That's the situation I found myself in when I built OnePush—a web app that lets you write a blog post in a single interface, then publish it to multiple platforms at once.
The idea was born when I wanted to cross-post my Hashnode blogs to DEV and Medium. The prospect of merely copy-pasting everything over seemed absurdly primitive, and that old cliche of "There has to be a better way!" was playing in my head—and suddenly I was spinning up a NextJS app in VS Code.

React and Next proved good enough for building the UI/UX I wanted, but Next's API features are too limited for a project that needs to scale.
What would you do?
Build your own REST API? That's fine, but your backend will have the complex task of remapping of all the data it receives through your API to different query structures before sending it to the API's of the platforms. What I mean is, posting an article through the DEV API will be different from posting it to the Ghost CMS or Medium API's. So you would be making a REST request to your backend, which then makes different REST requests!
Worse, REST API's tend to return too much information, sometimes in an unclear structure. For my use-case, I only needed the URL of the post after it was created. I wanted users to be able to post their blogs, then get the URL's to share them on their socials.
Oh, and hosting your own node server isn't free!
Digital Ocean starts at $5 per month, and other options run higher, but as your project scales your costs will grow—and so will the effort to maintain your code.
It's not the most attractive undertaking.
So to summarize, I wanted a simple API that allowed me to send off straightforward requests, then responded with one particular piece of data—the url of the post after it was created, or the error message if it failed. Can you think of any technologies that might offer that functionality?
GraphQL To the Rescue!
The more experienced among you said GraphQL! But you need Express and Apollo to create your own GraphQL API, don't you?
Well...
Enter TakeShape.io
Not if you use TakeShape! In fact, all the issues I mentioned above can be wiped out if you abstract away your backend with TakeShape's API Mesh!
TakeShape is mainly a tool for easily creating JAMstack websites, but one of their emerging features is their API Mesh. The Mesh is a tool that allows developers to create GraphQL schemas directly in a JSON editor, then use those schemas with GraphQL queries from your frontend code.
Basically, you create an API, you would have done with Express and Apollo on your own NodeJS server—but instead it's extremely streamlined, and everything is handled on TakeShape's servers.
You add as many API's as you want, set up how you want to be able to interact with those API's, and you're done! You can now use GraphQL in your app.
The best part is, it's free for Developers for the first 10,000 API requests. Perfect for setting up an MVP that can scale to meet demand—and if all you're making is a hobby project, you'll never blow through that limit.
Sound awesome to you?
Well then, let's walk through the process of how I saved money and abstracted away my backend with TakeShape!
Connecting our first API as a service
Our first goal is to attach an API to our mesh, so we can make requests to it as GraphQL queries and mutations.
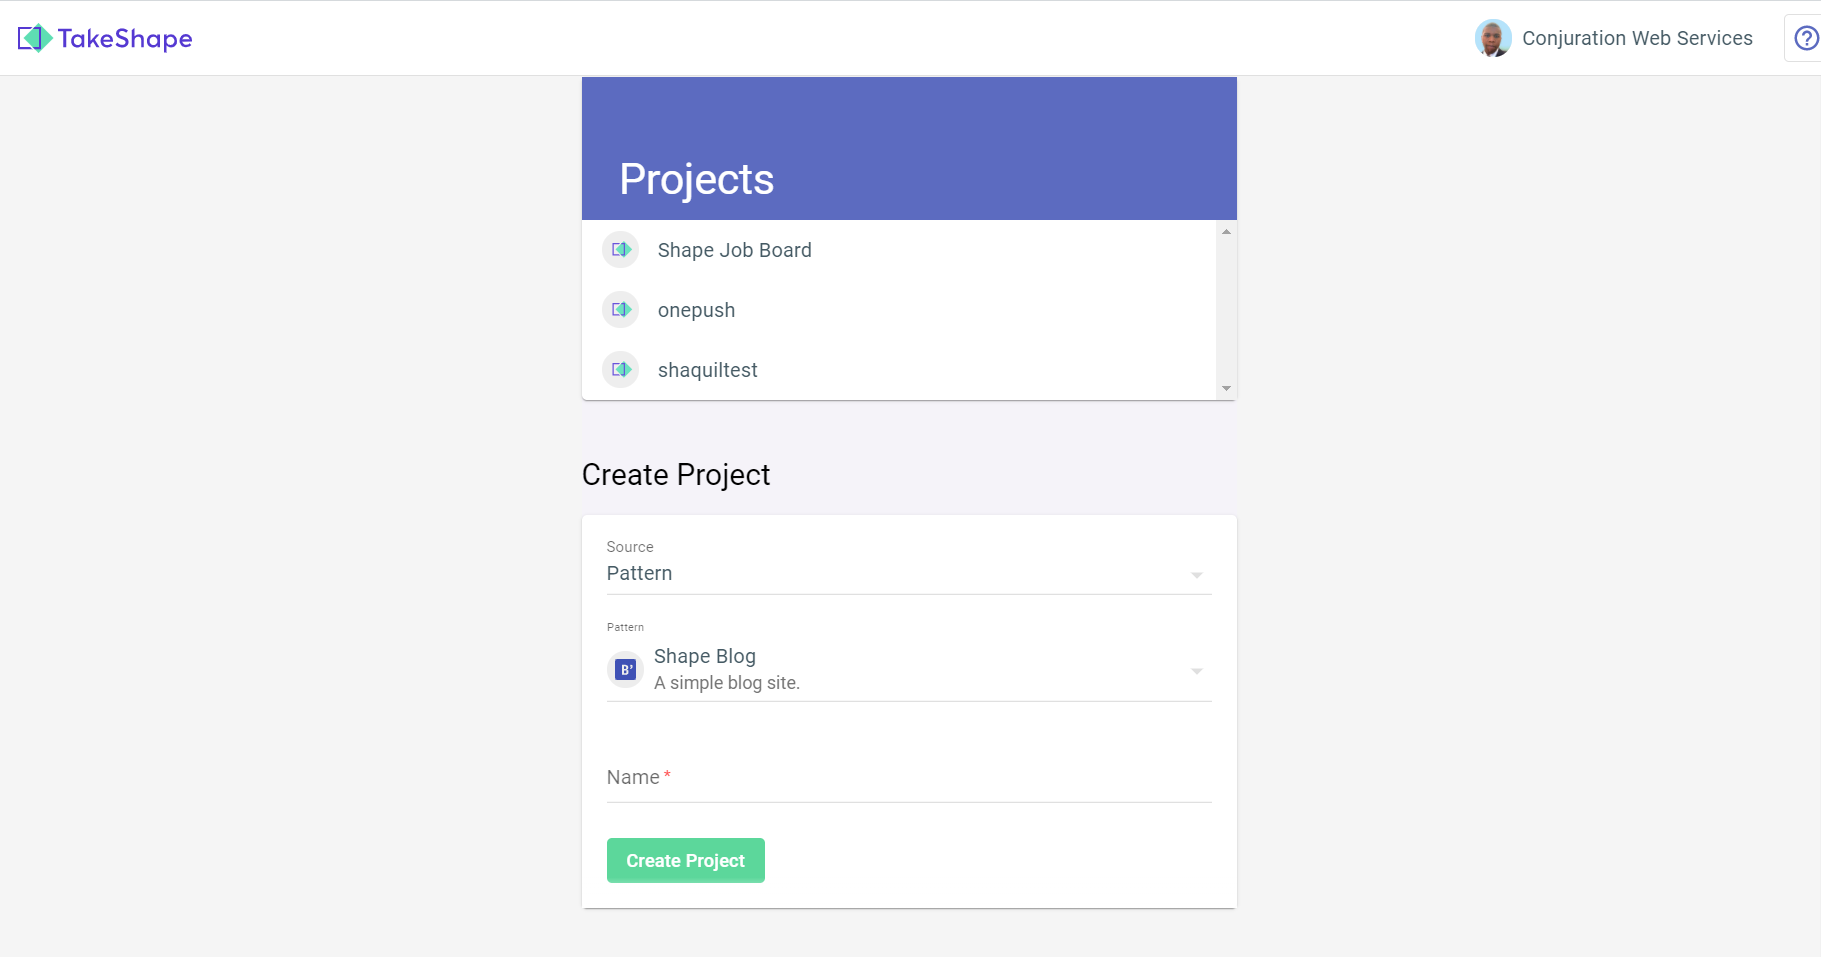
The first page you'll reach after you register is the project page. There are several options for templates, but to use the API Mesh in your custom project, you want to click on Source, then select Blank Project from the dropdown menu. Set the name of the project. Ours will be called onepush.
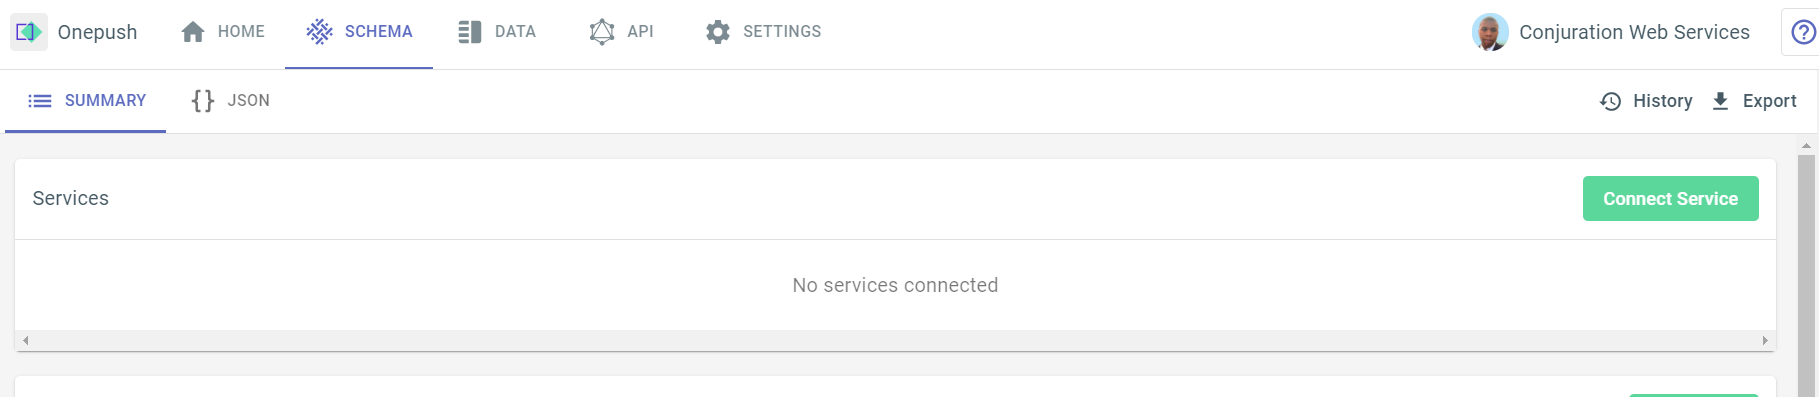
Once there, you'll want to click on the schema tab at the top, so you can create the schema you'll use for your GraphQL API.
The process is so simple that we're not too far from being done, actually!
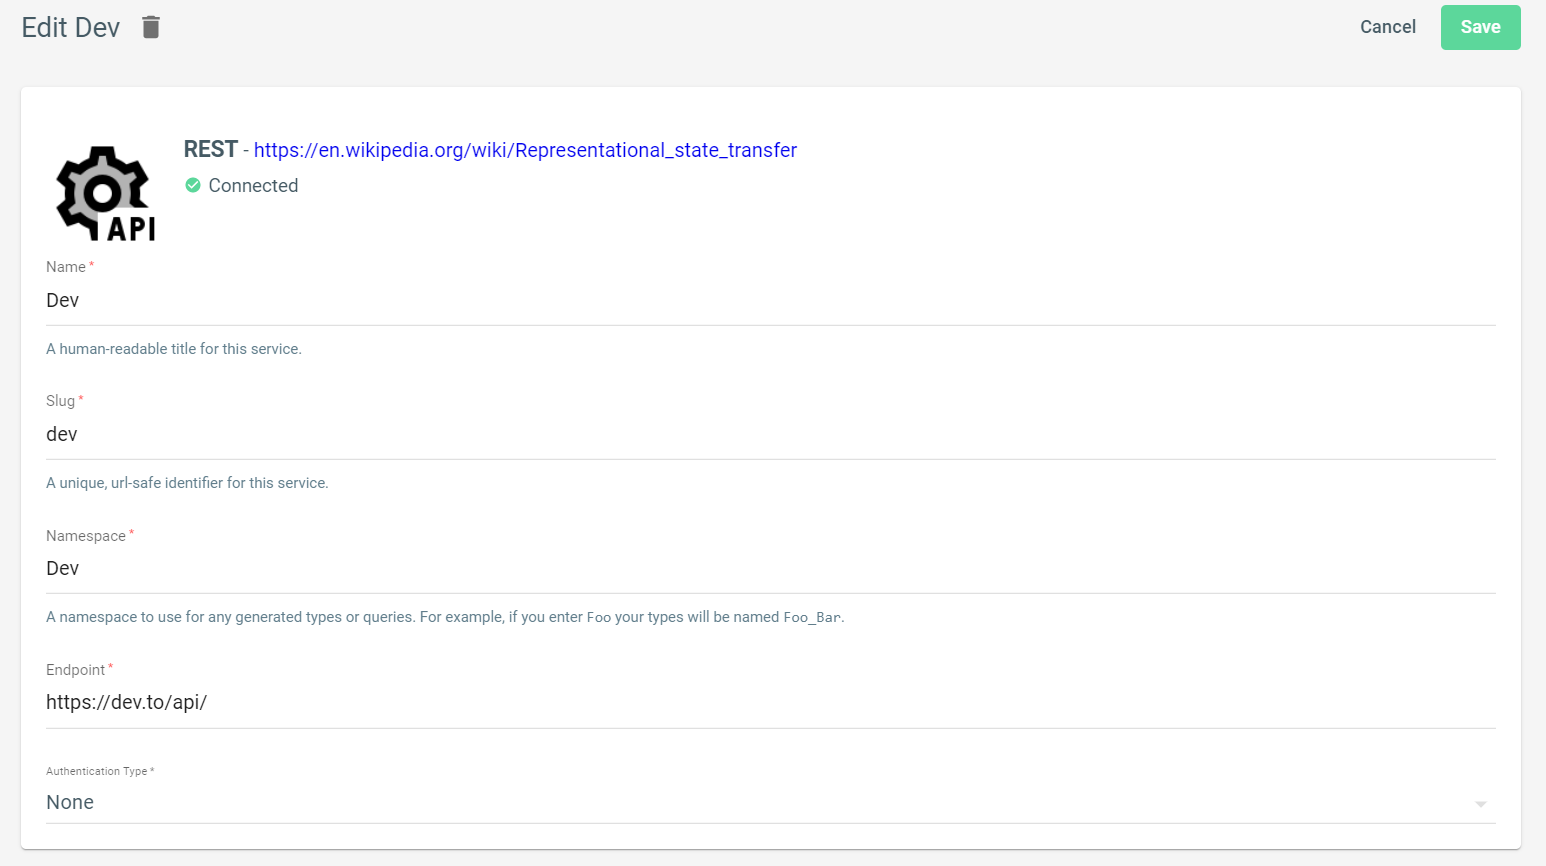
Click Connect Service, and choose REST API. Then fill in the name of the service, which can be whatever you want, as well as the slug and namespace. The endpoint field should have the root API URL, with no specific endpoint added. Leave Authentication as None, so you can customize authentication yourself in your schema.
That's all we need to do in the GUI! Now save your service in the top right, then click Schema in the navbar again. You'll see two buttons appear below the nav, one that says Summary and one that says JSON. Click JSON.
This will open up an in-browser text editor that allows you to edit your API schema. Don't get intimidated! This isn't any more complicated than what you would've had to make on your own with Express; it's just all laid out beautifully for you.
If you scroll down a little, you'll see a field called "mutations" with an empty object as its value. In GraphQL, a mutation is any query that's meant to change something in a database. Inside the mutations object, we're going to create a field called "postToDev". Why? Because I want to make a mutation query that posts my article to DEV. If you wanted to make a mutation that did anything else, you could name it appropriately. The name itself is entirely up to you.
Inside the "postToDev" object, we have four properties: description, shape, args and resolver. You can fill out the description yourself, but lets talk about what each property of this object does.
"postToDev": {
    "description": "Posts to dev",
    "shape": "DevResponse",
    "args": "PostToDevArgs",
    "resolver": {
        "name": "rest:post",
        "service": "dev",
        "options": {"path": "articles"},
        "argsMapping": {
            "body.article.title": [["get", {"path": "args.title"}]],
            "body.article.body_markdown": [
                ["get", {"path": "args.body_markdown"}]
            ],
            "body.article.published": [["get", {"path": "args.published"}]],
            "headers.api-key": [["get", {"path": "args.api_key"}]]
        }
    }
}
Shape
The "shape" property tells this mutation what the shape of the response will be after it makes the REST request. "Shape" is jargon for the structure of the object you receive from an API. You'll hear it used a lot even outside of GraphQL contexts. If you have a JSON object called "person" with properties {"hair":"red", "heightInFeet":5}, then the shape of that object would be that it has a string called hair and a number called heightInFeet.
As you can see in the code above, I set "shape" to "DevResponse". This is an object I've defined elsewhere in our schema, so let's take a look. Scroll down through your scheme past mutations to the "shapes" field.
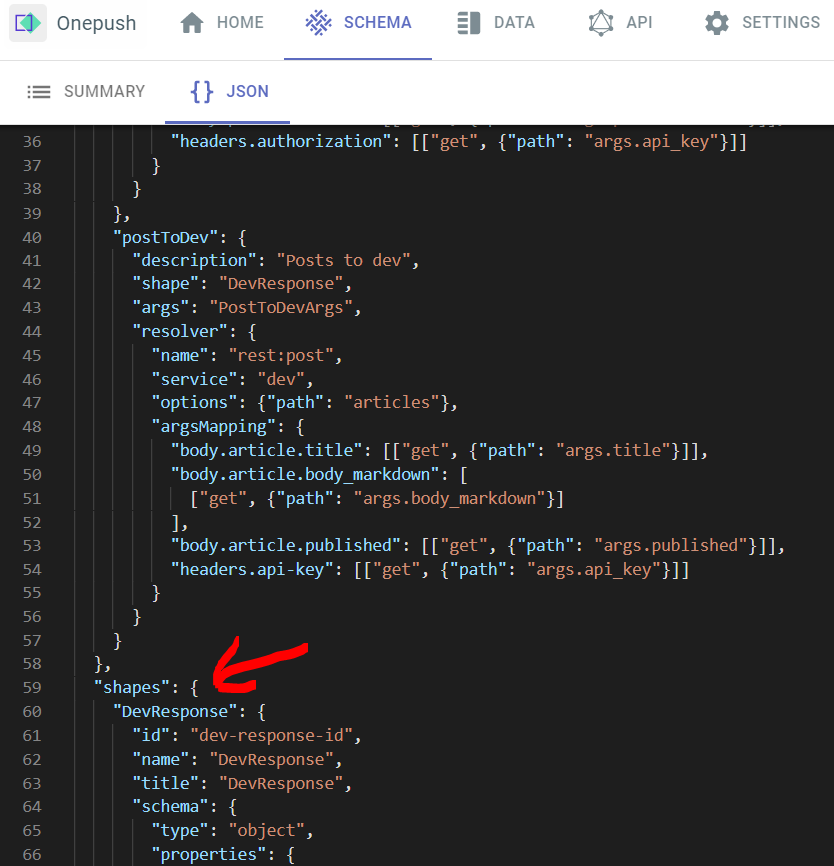
As you can see in the image above, "shapes" is an object that contains objects. The objects within "shapes" contain properties to describe themselves, as well as information about the structure of the data they represent.
To make it simple, the shape for the response I expect from the server after posting my article to Dev is named DevResponse. Perhaps in the future I'll name it DevPostResponse to be abundantly clear.
Here's the structure of "DevResponse", but don't feel obligated to read every single detail:
"schema": {
    "type": "object",
    "properties": {
        "type_of": {"type": "string"},
        "id": {"type": "number"},
        "title": {"type": "string"},
        "description": {"type": "string"},
        "cover_image": {"type": "string"},
        "readable_push_date": {"type": "string"},
        "social_image": {"type": "string"},
        "tag_list": {"type": "string"},
        "tags": {"type": "array"},
        "slug": {"type": "string"},
        "path": {"type": "string"},
        "url": {"type": "string"},
        "canonical_url": {"type": "string"},
        "comments_count": {"type": "number"},
        "positive_reactions_count": {"type": "number"},
        "public_reactions_count": {"type": "number"},
        "collection_id": {"type": "number"},
        "created_at": {"type": "string"},
        "edited_at": {"type": "string"},
        "crossposted_at": {"type": "string"},
        "published_at": {"type": "string"},
        "last_comment_at": {"type": "string"},
        "published_timestamp": {"type": "string"},
        "reading_time_minutes": {"type": "number"},
        "body_html": {"type": "string"},
        "body_markdown": {"type": "string"},
    }
}
First there's the id, which can be any unique string that doesn't match the id of your other shapes. Think of it like a slug for your shape. Then there's the name, which will be used to reference this shape. It's important for how I used it earlier, where I referenced it in the "shape" field of my mutation. Title is a similar situation to name. Then you have schema.
The schema is an object that describes the shape of the data it represents. To phrase it in less jargon, the schema describes what the JSON object you're expecting to get from the DEV API should look like. Remember, a shape is just a description of the structure of an object containing data. The schema actually lays this description out.
So in our earlier example where I created a theoretical person object with properties "hair" and "heightInFeet", I would use the schema in my shape that represents the person object to describe those properties. The "hair" property is a string, and the "heightInFeet" property is a number. Let's look at it again:
"schema": {
    "type": "object",
        "properties": {
          "type_of": {"type": "string"},
          "id": {"type": "number"},
          "title": {"type": "string"},
          "description": {"type": "string"},
          "cover_image": {"type": "string"},
          "readable_push_date": {"type": "string"},
          "social_image": {"type": "string"},
          "tag_list": {"type": "string"},
          "tags": {"type": "array"},
          "slug": {"type": "string"},
          "path": {"type": "string"},
          "url": {"type": "string"},
          "canonical_url": {"type": "string"},
          "comments_count": {"type": "number"},
          "positive_reactions_count": {"type": "number"},
          "public_reactions_count": {"type": "number"},
          "collection_id": {"type": "number"},
          "created_at": {"type": "string"},
          "edited_at": {"type": "string"},
          "crossposted_at": {"type": "string"},
          "published_at": {"type": "string"},
          "last_comment_at": {"type": "string"},
          "published_timestamp": {"type": "string"},
          "reading_time_minutes": {"type": "number"},
          "body_html": {"type": "string"},
          "body_markdown": {"type": "string"},
        }
      }
Your schema has a type, which is any valid JavaScript data type. It also has "properties", which is an object that describes the properties of your response. To know what properties the response will have, you'll need to hit up the docs of the API you're using.
As you can see, there are a lot of properties DEV attaches to its response when you successfully post an article. Too many, honestly! You don't have to specify every possible property when you lay out your shape, but it's nice to have access to that info if you need it. When you execute a mutation on your API later, GraphQL will allow you to specify which of these properties you want to receive.
Args
Now let's talk about the args property of the mutation. Gotta scroll back up to our postToDev mutation.
Args is extremely similar to shape. It takes a shape, which you will define similarly. The only difference is, this shape is used to define which arguments your mutation will accept before the API call is made. It's basically the shape of your request. Here's the code for my args shape:
"PostToDevArgs": {
      "id": "post-to-dev-args-id",
      "name": "PostToDevArgs",
      "title": "PostToDevArgs",
      "schema": {
        "type": "object",
        "properties": {
          "title": {"type": "string"},
          "published": {"type": "boolean"},
          "body_markdown": {"type": "string"},
          "api_key": {"type": "string"}
        },
        "required": ["published", "title", "body_markdown", "api_key"]
      }
    },
As you can see, it's a standard shape. Again, you'll need docs for whatever API you're using to know what valid properties you can set. To be clear, these properties should be whatever the REST API would expect to be in the body of the request.
Note the "required" array, to which I added every property. This protects you from making mutations that are ill-formed, because it throws an error immediately rather than sending a bad request to the API endpoint if you're missing any information.
Resolver
The final property is the resolver. Let's look at the postToDev mutation again:
"postToDev": {
      "description": "Posts to dev",
      "shape": "DevResponse",
      "args": "PostToDevArgs",
      "resolver": {
        "name": "rest:post",
        "service": "dev",
        "options": {"path": "articles"},
        "argsMapping": {
          "body.article.title": [["get", {"path": "args.title"}]],
          "body.article.body_markdown": [
            ["get", {"path": "args.body_markdown"}]
          ],
          "body.article.published": [["get", {"path": "args.published"}]],
          "headers.api-key": [["get", {"path": "args.api_key"}]]
        }
      }
    }
As you can see, our "resolver" has multiple properties. First, you have the name, which describes which resolver in TakeShape's arsenal we'll use. If your service is REST, you have to use rest:[method]. The method is whatever request method you're using. All are supported, but in the case of most API's you're going to use POST to submit content to a database—so we use "rest:post". If you wanted to GET, you would use "rest:get" as the "name".
The "service" refers to the slug we set in the UI earlier when creating our service in the GUI. I set mine to dev.
Then "options" takes a variety of values, which you can find by referring to the TakeShape documentation. For our purposes, we need to give it an object with a property of "path", which we'll set to the API endpoint we're using.
Our API URL is: dev.to/api
The specific endpoint is /articles. By setting our path to "articles", we're telling our schema to post to dev.to/api/articles
Finally, we have the "argsMapping". This is the object that lets us tell the schema how to assign our arguments to the REST request. Let's look closer:
"argsMapping": {
          "body.article.title": [["get", {"path": "args.title"}]],
          "body.article.body_markdown": [
            ["get", {"path": "args.body_markdown"}]
          ],
          "body.article.published": [["get", {"path": "args.published"}]],
          "headers.api-key": [["get", {"path": "args.api_key"}]]
        }
The argsMapping essentially defines the shape of our request. For DEV, in the body of your REST request you must have an article object. The article object takes several properties, but the ones we care about are "title", "body_markdown", and "published". To set these things, we must add them to the argsMapping object as "body.article.x" where x is what we're adding.
In the headers, we have to add an api-key property for authorization. This is where we get specific to my particular app. See, I want users to be able to use OnePush to post their accounts on different blog platforms. They have to manually enter their authorization details, and then I have to pass that along in my request.
If you were simply implementing the mesh with no need for dynamic headers, you would set the authorization in the UI on their website.
Done with the schema!

And that's it! You have a GraphQL schema you can just... use! No apollo and no Express! And, of course, no backend.
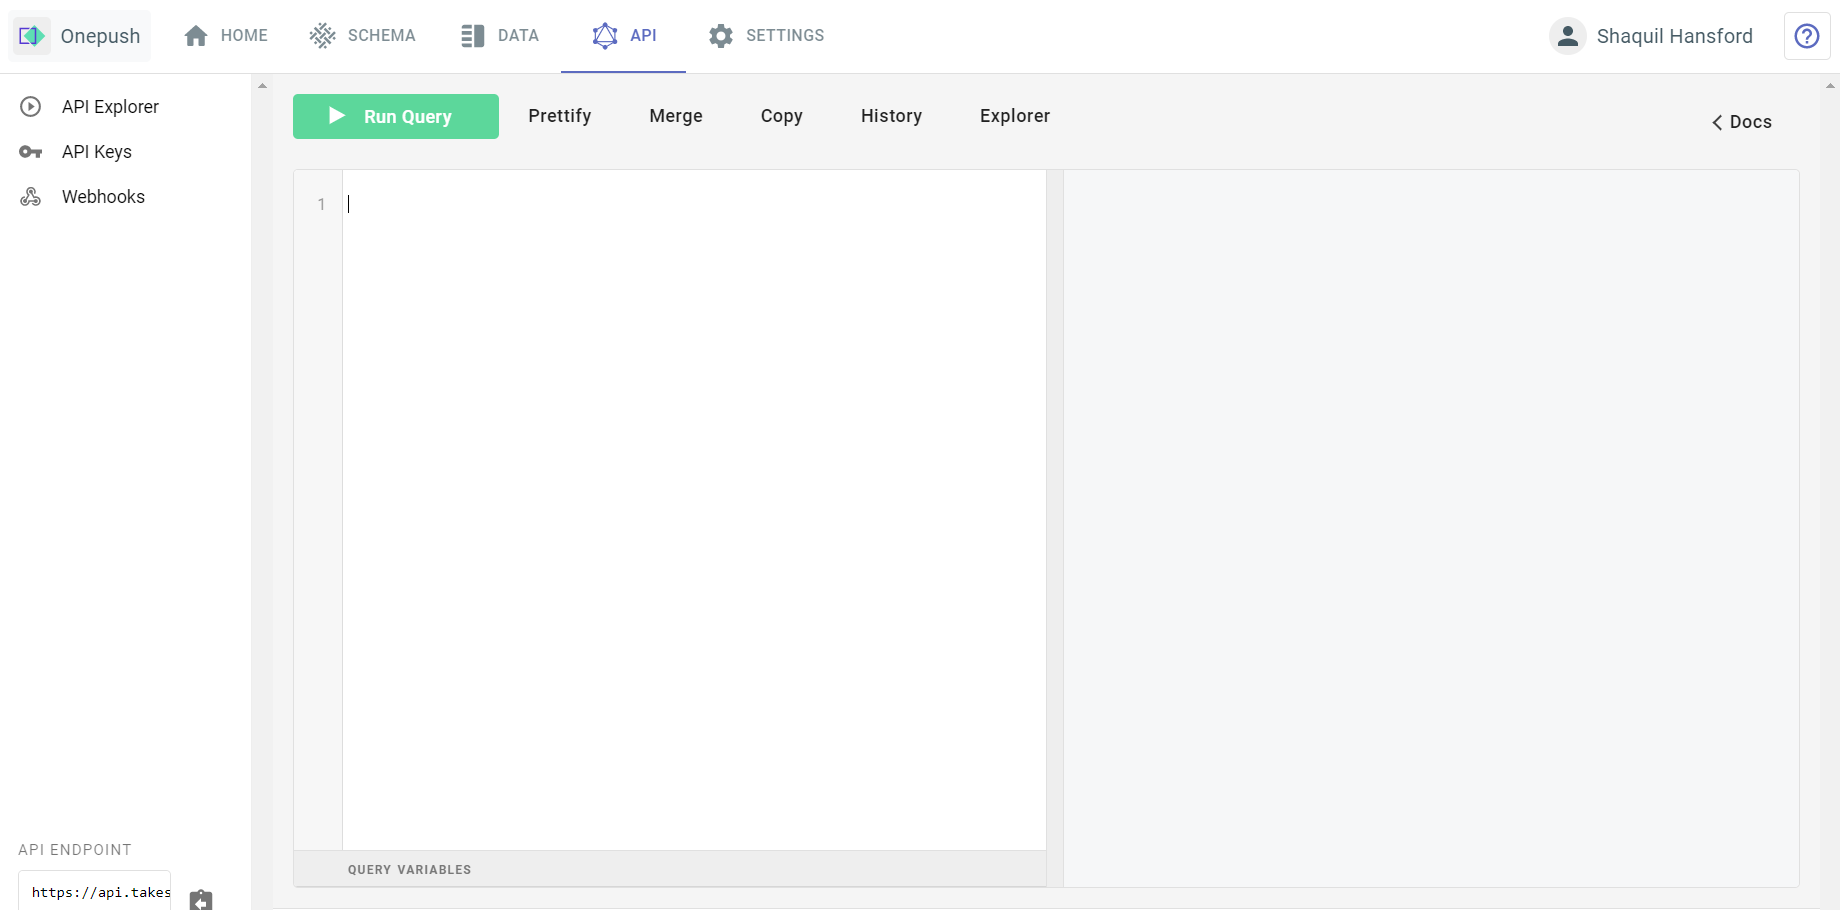
So how do you use your schema? Well, first of all you'll want to test it out with the API explorer on the website. Click API in the navbar, and you'll be taken to a page with an editor.
You can write up a mutation, hit run query, and watch the result appear on the right side. Here's my mutation:
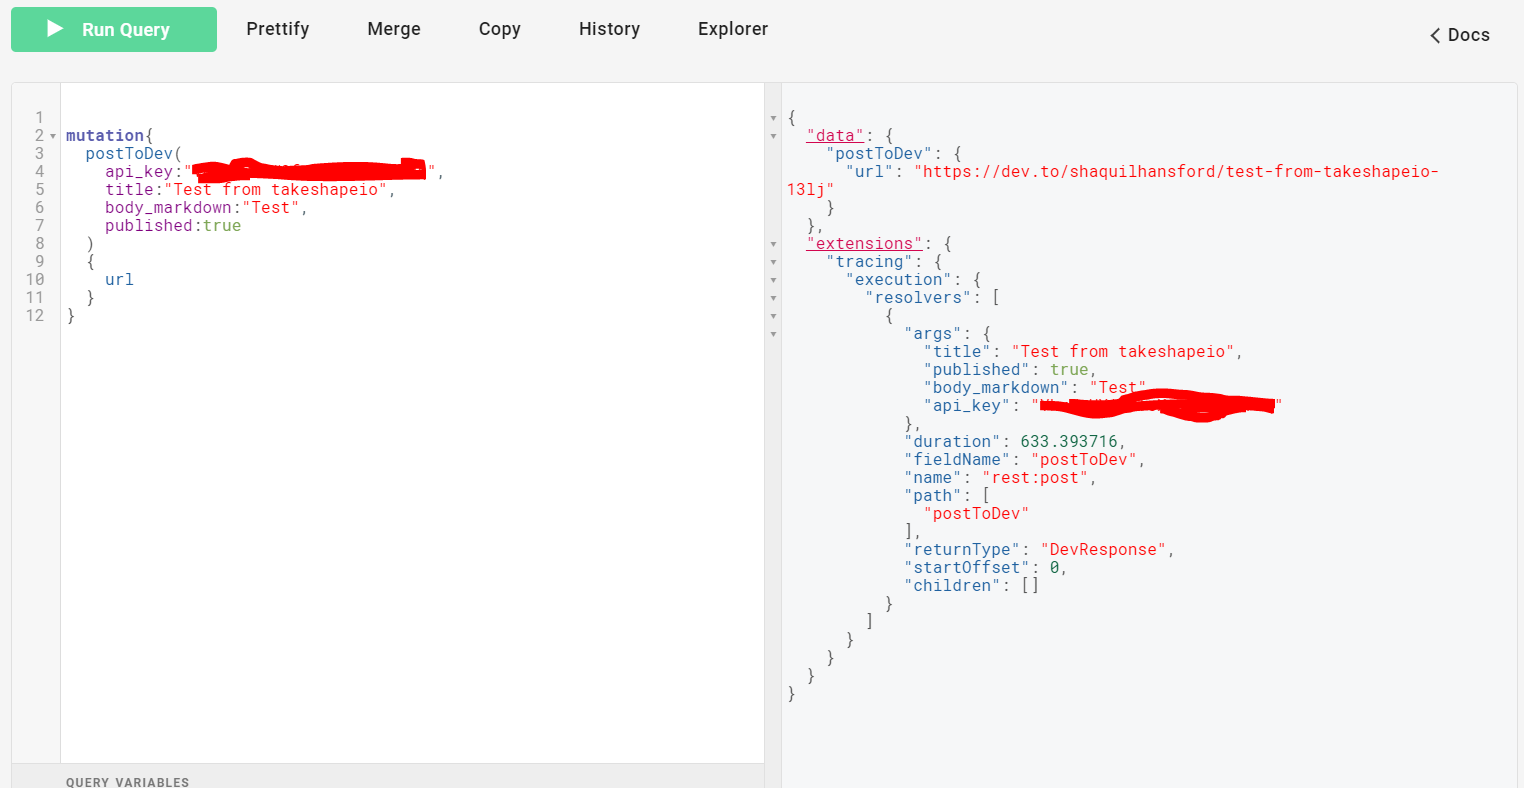
On the left side, you can see how I set up my query. You enumerate each argument in the parentheses, separated by commas, and then in the brackets specify which value you want back.
On the right side, you can see the response I get: Just the url, like I wanted! So clean and simple. Now let's look at how we would add this to our code!
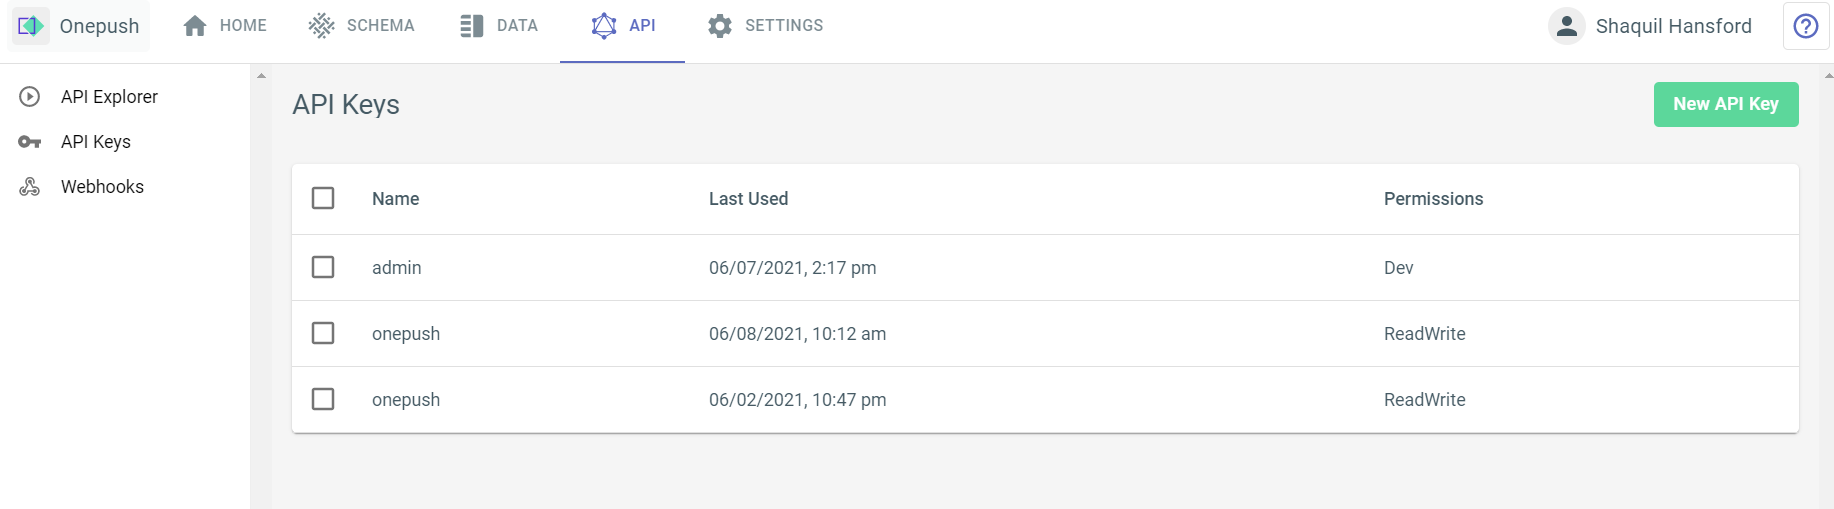
First you have to select the API Keys option on the left side. Then, you click New API Key on the right. You'll generate a new API Key, which will only be shown to you once. If you lose it, you'll have to make another.
Take that API Key and hold it. We'll be using it in a fetch request we make on the frontend of our application.
Next, we'll need our Project ID. You can find this in two places: By clicking the home tab of the navbar and copying it from the example request code, or by going to your schema and opening the JSON editor.
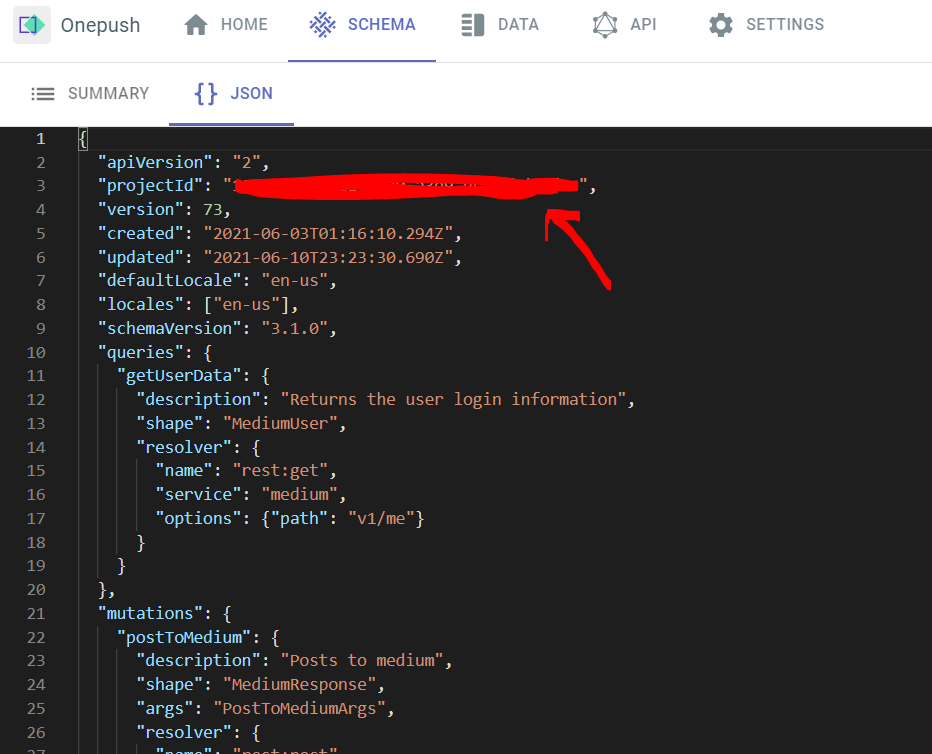
Copy that too. Now here's what your fetch request should look like on the frontend of your project:
fetch('https://api.takeshape.io/project/YOUR-PROJECT-ID-HERE/v3/graphql', {
    method: 'POST',
    headers: {
        'Content-Type': 'application/json',
        'Authorization': 'Bearer TAKESHAPE_API_KEY'
    },
    body: JSON.stringify({query: mutation})
})
Replace YOUR-PROJECT-ID-HERE with your projectId, and TAKESHAPE_API_KEY with your TakeShape API key and you're almost there. Only issue is that body. Why is it taking an object with query: mutation?
Well, the TakeShape API expects your post request to have a query property on its body. The mutation is just a string containing the same query we entered into the API Explorer:
const mutation = `mutation {
	postToDev(
		api_key:${userApiKey},
		title:${userBlogpostTitle},
		body_markdown:${userBlogpostMarkdown},
		published:${shouldPublish}
	) {
		url
	}
}`
And there you have it! For my use-case, I now have a single API endpoint that I can make all my queries to, which is my TakeShape project. The GraphQL implementation details are handled magically on their end, and I no longer have to concern myself with breaking apart the response I get back; I'll always get back what I ask for, which in this case is just the URL!
What the future holds

I'll admit, I was a bit skeptical of the value TakeShape's API mesh could offer. It seemed like it would just be adding a bunch of extra work for little payoff.
But now that I've seen how it can abstract away a backend entirely, while offering the amazing benefits of GraphQL totally free of charge to small developers, I want to use it going forward when building out MVP's of all my SaaS product ideas.
To get started with TakeShape, head on over to their site and set up an account now!
Follow me for more awesome content!
Thank you so much for reading. I'm @shaquilhansford on Twitter, and you can follow me if you want the inside scoop on growing as a freelance web dev!